|
Build Report #49 (05.10.2005)
|
Long time no see.
Well, we made it. Details of the presentation day have been uploaded in the form of our second major test. In short, things went well. As can always be expected, several little things went wrong, but we did finally make it through and we put on a very impressive show. Right after the presentation, we blew the new speed controller, but we've dealt with that situation, and are now preparing the robot for its new controllers.
As for us, we're officially graduated now! We finished our last term, took all our finals, and got to wear our cute little caps and gowns. For the past few weeks, I've been on vacation (hence the lack of updating). And, of course, by vacation I mean I've been sleeping. A lot. It's been great.
Anyway, in order to reflect the new state of this project (no more deadlines! Yay!), I'm going to make a few changes to these build reports. First of all, they'll be reports, not days. We're going to be working at a much more relaxed pace, so I expect build reports to span a few days (I'll still include the date of the post, but it'll incude pictures from the previous few days). Also, "Total Time" and "Status" aren't really important anymore, so they're getting tossed. "Total Time" was always a little sketchy anyway, because sometimes it was hard to decide what counted as manufacturing time and what counted as development time. Regardless, once you breech 1200 hours (which I did, by the way, today), it doesn't really matter anymore.
Enjoy the future reports. We've still got a lot stuff we want to do with this project, even if we're not getting graded anymore. And really, what did you expect? You think I'm going to sit around with a 400 pound robot in my basement and not play with it? Yeah, right.
|
| As long as I had the tracks off the robot, I decided to have a little go at making the seam even stronger. I'm really worried about it because just before the presentation I noticed that one of the corners was separating. I'm still not sure if the seam was slightly off and it had just stretched to even itself out or if what I was seeing was the start of a Very Bad Thing. Anyway, this picture was meant to show the results of my effort, but it decidedly doesn't. You'll just have to take my word for it. I went nuts on the seam with a staple gun in hopes that they would help distribute the loads. |
 |
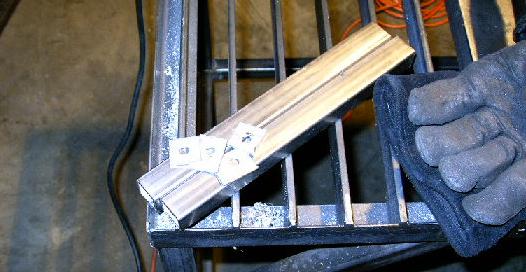
| One of the main problems I've had with the tracks is actually a shortcoming of my design. I missed some pretty important angles when I designed the tensioners, and it had some unexpected behavior. The biggest one was the self-energizing motion of the tensioner spring. In other words, when I drove forward, the driving torque actually pulls the tensioner arm around stretching the track. This puts a lot more force through the track than I anticipated and is really hard on the seam. None of this would be a problem if the inside of the track was flat like I'd assumed, but the reinforcing bar actually protrudes slightly, causing a lot of unexpected forces. In any case, these little bits of steel are intended to solve that problem. They'll replace the compressed nitrogen springs, making the tracks a more or less static system. This is far less elegant that the original solution (or, at least, it would be if it'd worked the way it was supposed to), but I think it will work, and it should result in far less loss to the track, more power, and less stress on the seams. |
 |
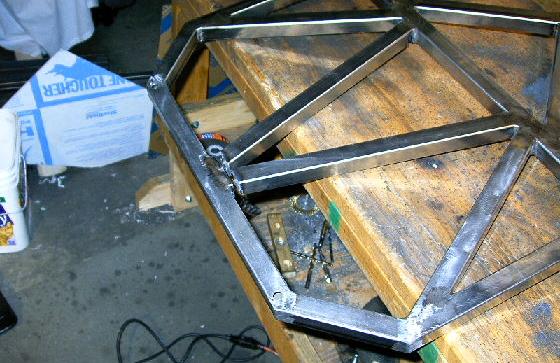
| Here's a picture of the first ugly cuts in the top panel. The new speed controllers won't fit into the little compartment left for the AX2550, which meant I had to get creative. I've designed a Lexan panel that will be shock mounted on top of the front two batteries to hold the new electronics, but they'll stick up through the top panel where these two members cross, which means they've got to go. It's a shame, after the trouble I put into shaping and welding them in just right, but there isn't really any way around it. |
 |
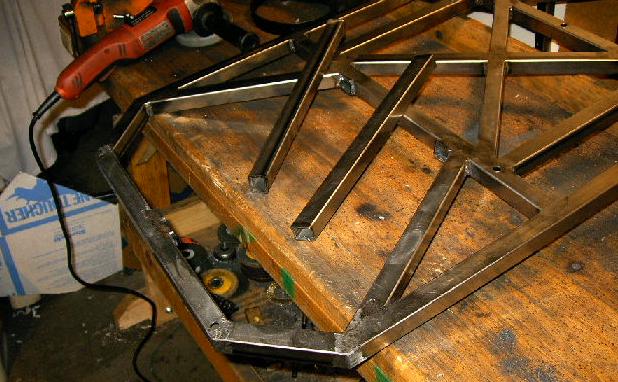
| A little more time with the grinder and the top panel was officially dismembered. That should provide plenty of room for the cooling fans on the new controllers (a nice pair of MC1-HVs made by Robot-Solutions). I'll be welding a new member in straight down the middle later. This won't be as strong as the two I just removed, but the whole top panel is significantly over-engineered, so this won't be a problem. |
 |
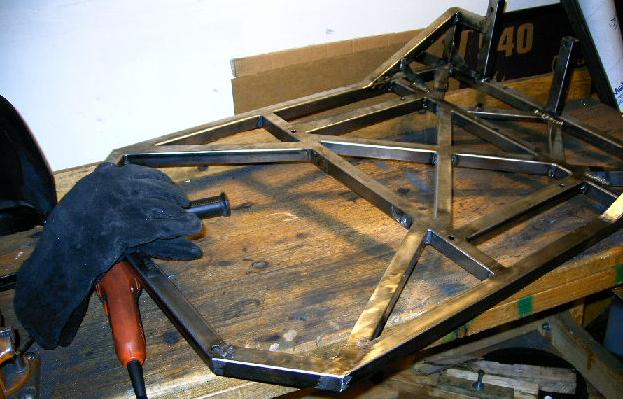
| A lot of grinding later, the ends of the steel tubes that were left welded to the panel were all gone. The edges are a little rough there, but that's just fine. I'll probably weld a little bit of reinforcing strap where they used to be to make sure that everything stays nice and strong (it's hard to tell how much of an impact what I've just done has had on the integrity of the tubing). |
 |
| This is the Lexan plate that the new controllers will be bolted to. It's 1/8 of an inch thick, and will be supported by strips of mousepad to provide vibration control. The shape is so that it will fit over the batteries and allow room for the terminals and heavy battery wire that has to share the space. It will also provide mounting holes for the master power switch. |
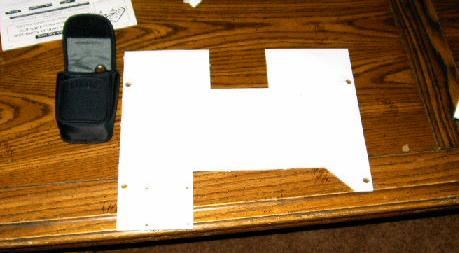 |
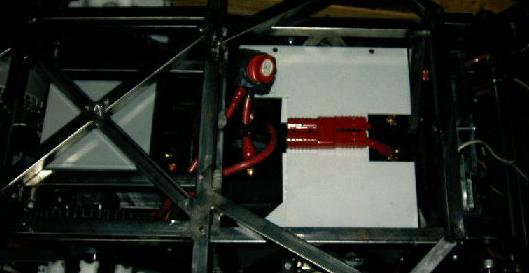
| Here's how it will fit in. The holes will be used to hold the panel to the steel tubing that bolts in to hold the batteries down, the small notch is for the two cables on the right, while the bigger notch allows room for the mess of cables that gets shoved into the middle of the chassis. The wiring certainly isn't pretty, but it's the best I could do. In order to make room for the controllers, I had to eliminate the nice "one connector per battery" configuration that I had before. |
 |
| That's it for now. I can't really do much more until the new controllers and other hardware gets here. We've got two MC1-HV's in the mail, a PWM driver (we decided to have some fun and make our own interface board), and lots of bits 'n pieces. Hopefully we'll have the robot working again in the next week. |
 |
| End, Build Report #49 (05.10.2005) |
| Progress: |
Stapled track, made new tensioner bars and speed controller mounts. Cut allowances in the top panel for the new controllers. |
| Time: |
4 hours |
| Next Steps: |
Make interface board. Install and wire new speed controllers. |
|