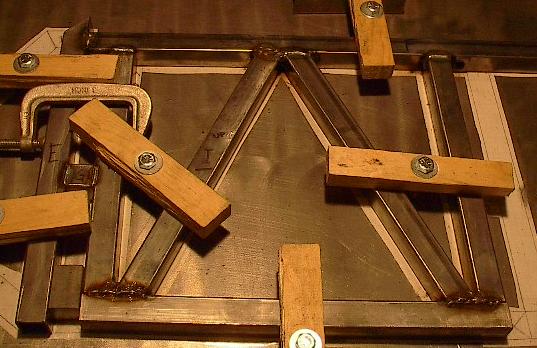
| Thanks to to set up done last build day, today I got to jump right into welding. Unfortunately, this means that everyone gets to see my ugly welds. The nice thing about metal working is that it's so forgiving -- no matter how ugly a weld is it can almost always be ground down nice and flat. However, because it's a major step in the process, here's a picture of my welding before I get to pretty it up. |
 |
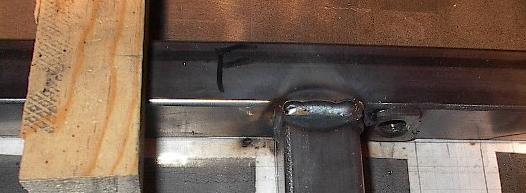
| Of course, not all of them are bad. Here's a shot of one that turned out pretty good. A nice, even bead, reasonably good penetration, no burn-through. However, this wasn't representative of my work overall. |
 |
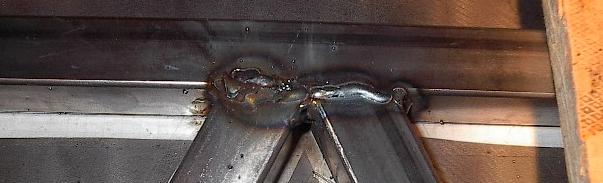
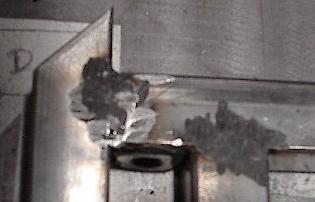
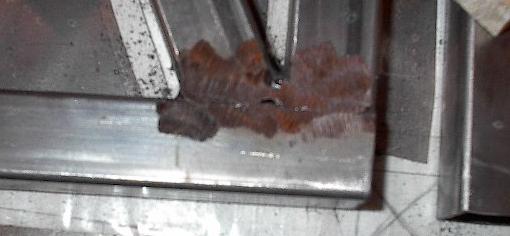
| For every weld that looked like the one above, there was one that looked like this. The left half of this weld burned through the steel. I'm used to working with much thicker steel, so it took me some practice to get used to this 1/16 inch wall stuff. After I burned it through, I had to build it all back up again to get something that was going to be at all passable. This should look ok after I grind it, but it won't be as strong. |
 |
| And here's how it looks ground down. Now I'm just roughing everything flat so I can flip it over and do the other side -- it won't look great until I brush everything to get an even finish. |
 |
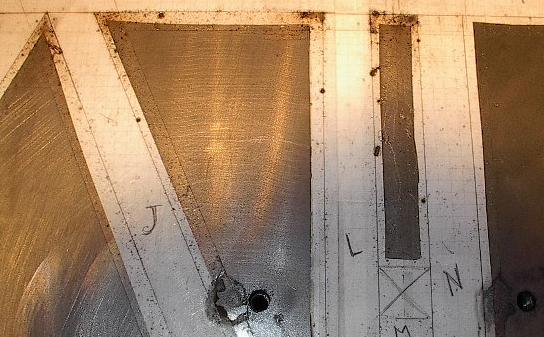
| Grinding everything down also shows us exactly how good the penetration was. The right weld is how it should come out looking: no cavitation or cracks. On the left, we can see that there's a gap where the weld bead didn't penetrate into the steel far enough. I'll have to weld over that section again. |
 |
| After filling the gap in and grinding it back down, it looks like this. Much better. |
 |
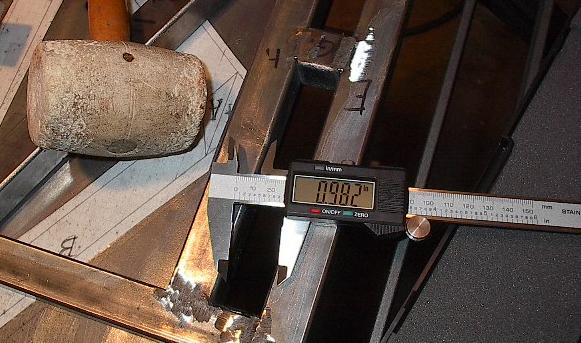
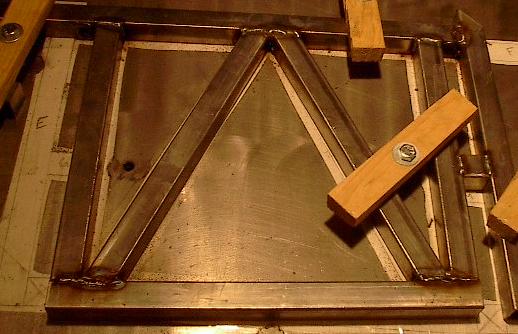
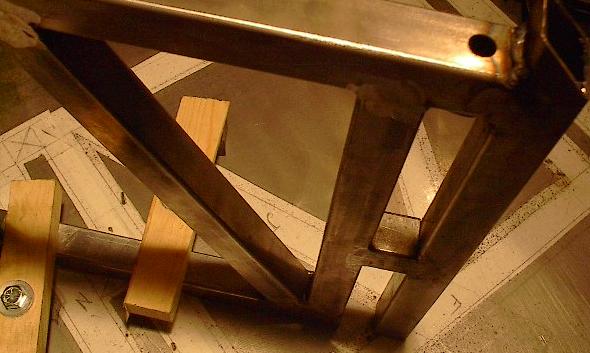
| After bringing all the joints up to a level I was happy with, I unbolted everything and took a minute to evaluate the process. Problem number one: my spacers were stuck. There are two metal blocks in there that are exactly one inch thick; I clamped them there so that the space between the two members would be just right. Now, after taking off the clamp, they appear to be in there a little more tightly than I'd expected. |
 |
| I was able to get them out without too much trouble through the liberal application of a high-precision rubber hammer, but that isn't really the problem. What I'm really concerned about is the size of the gap that's left behind. Looks like it's around 0.982 inches. I'm not really thrilled about this, but it should be close enough. I'd rather have it 0.018 inches low than high, because my Teflon glides will wear to accommodate this. |
 |
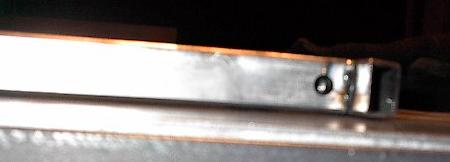
| Problem number two: the whole thing warped a little bit. It's a little hard to tell from this picture, but this corner is sitting just a hair above the table surface. This little amount is no big deal, but I'll keep an eye on it. I expect this to get somewhat better after I've welded the other side. |
 |
| Possible problem number three: do my bolts still fit? I've been welding right next to the weld nuts, so I thought I'd check to see if I'd compromised the threads in any way. They were a little rough, but it looks like it will be fine. |
 |
| Ok, I've addressed the issues, and I'm ready to move on. Time to weld the other side. My template isn't a lot of use now, but the clamps line up just about perfect, so I'm still using the same surface. It should be easier after the practice of the first side. |
 |
| Here are the welds on the other side. I had a much easier time with this side -- I'm starting to get the hang of the pass speed I need to get good penetration without burning through. |
 |
| Of course, there are still a few little things that need to be touched up. Another quick pass and another round with the grinder and this should be just fine. |
 |
| All this is really taking its toll on the template. It looks like hot ground steel is melting its way into the plastic lamination. It'll probably survive another round, and then I'll be done with the chassis side panels, so I won't need it anymore. |
 |
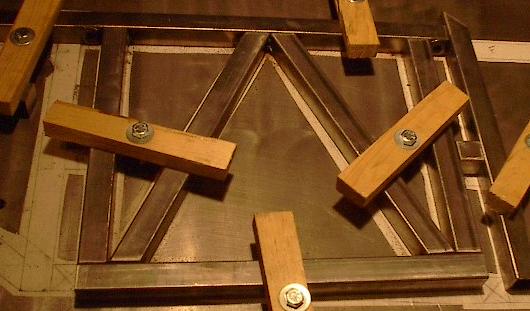
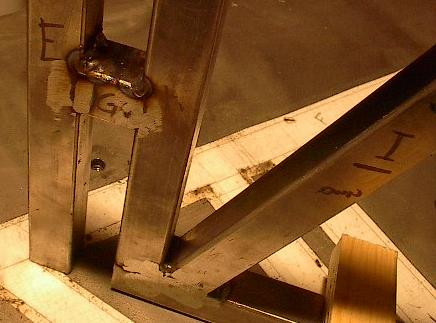
| Now that both sides of this part are welded, it's time to touch up everything I couldn't get to easily with the clamps in place. Here I've got the part stood up so I can weld the top next to the weld nut. We can also see here how versatile the clamping system is. So far, it's been indispensable. |
 |
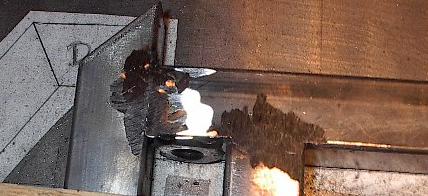
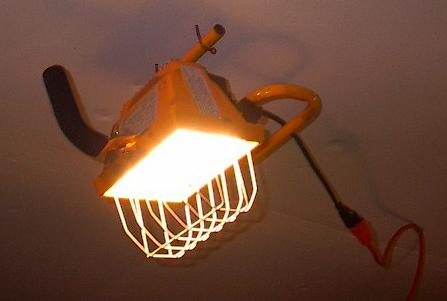
| Ugh. That went really poorly. My light picked a really bad moment to shift and it shone bright light directly into the inside of my welding mask. I welded this almost completely blind. |
 |
| I have a high intensity light hung from the ceiling over the table so I can see what I'm welding, but, as you can see, the mounting hardware is somewhat less than sophisticated. Apparently the wing nut got a little loose and, when the light got everything hot, the base swung around. It just sucks that it happened while I was welding a fillet that I can't grind down. Oh well -- nothing I can do about it now. |
 |
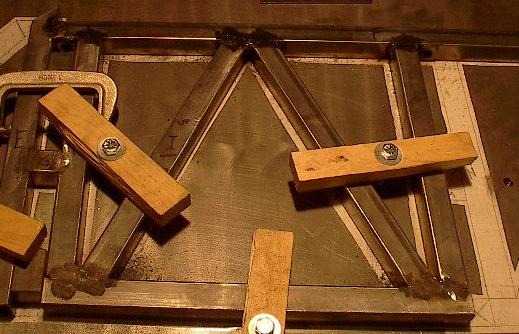
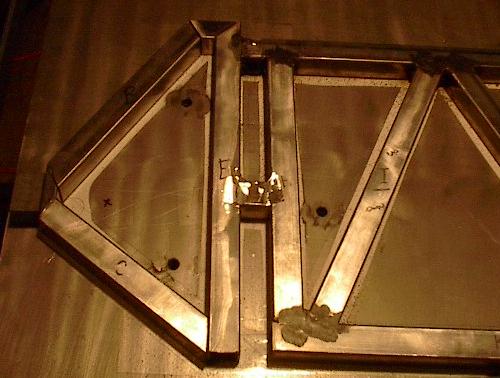
| Ok, everything should be all set for that chunk. Next time, I'll get to work welding up the front end, pictured here. Looks like I might have to reshape one of the little pieces, but that's work for another day. It's getting late so I'm going to pack it in. |
 |