|
Build Log, Day 46 (04.02.2005)
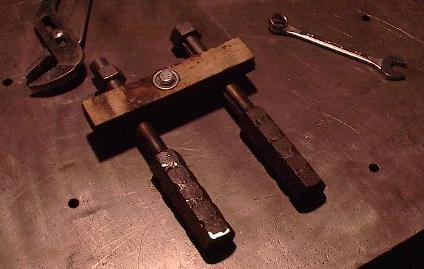
| Today, I just spent a little time taking care of some odds and ends. I can't really do much in the way of building until me new speed controller gets here, but I do have some new drive sprockets to fit. These are the axles that I've welded the nuts onto, but the hex size is slightly bigger than I'll be able to press, so I've got to grind a little off. |
 |
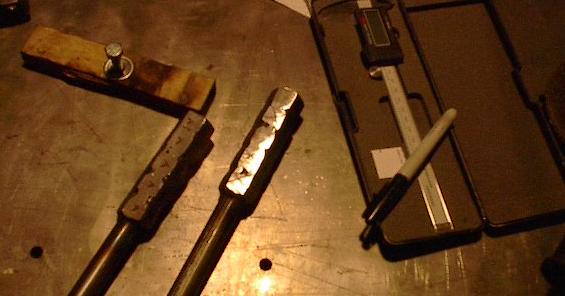
| I got each face leveled off, but I still need to take just a couple hundredths off of the hex size, so I'll take one more pass. I've taken a marker and drawn on all of the faces so that I can get a good indicator of how level my grind is. If I just erase all the marks nice and evenly, the hex faces should stay pretty close to aligned. |
 |
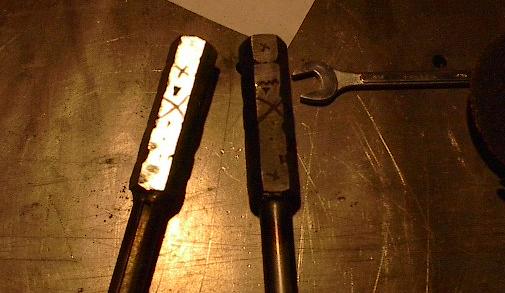
| Now it's time to get everything to just the size I want it. The drive sprockets are designed to be pressed onto a 1.0625 inch hex (it measures about 1.035 inches), but my tools aren't really good enough to get a perfect fit, so I'm aiming for about 1.055 to 1.06. I figure if I keep it in there, I'll be able to get it put together and still have a good tight fit. To that end, I've measured each hex, and marked them according to how much more I have to grind off at each point. I'll just repeat this procedure until I'm happy with it. |
 |
| Here's the second iteration of the same thing. The larger the "X," the more I have to grind off at that point. After this one, I only had to do a few more little tweaks to get something that I was pretty happy with. |
 |
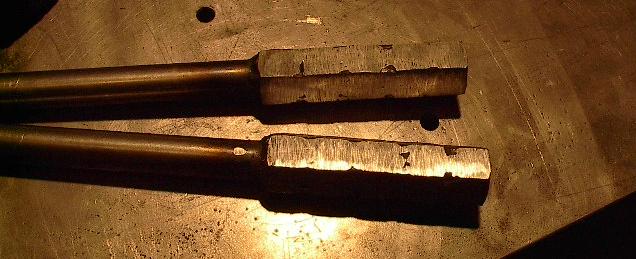
| This is the finished hex axle. It looks pretty good -- you can still see where the welds are between the nuts, but I'm not concerned with cosmetics here. This has a lot of shear area and will fit really tightly into the sprocket -- if this doesn't work I don't know what I'll do. |
 |
| Now they get to go live in the freezer. I was hoping that I would be able to hammer them into the sprockets after they got good and cold, but that didn't work out. I'm going to have to take these to school and use the tensile tester to press them into place. That means that I'm more or less done for the day. |
 |
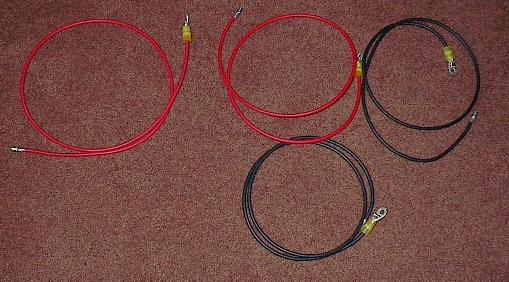
| Before I can call it quits, there is a bit of work I can do inside. First, I soldered some of my 18 gauge wires, but there wasn't really anything worth taking pictures of. Next, I spent some time crimping the fixtures on the new motor cables. Now that they're all done, I just have to wait until the speed controller gets here, wire it up, install the new sprockets, and get everything back together. That, and, of course, prepare my final presentation for Friday. |
 |
| End, Build day #46 (04.02.2005) |
| Progress: |
Ground drive axles to fit, did some wiring. |
| Time: |
5 hours |
| Total Time: |
310 hours |
| Next Steps: |
Press axles into sprockets. Wire ESC. Final assembly. |
| Status: |
Behind schedule, but I should be ready by Friday |
|