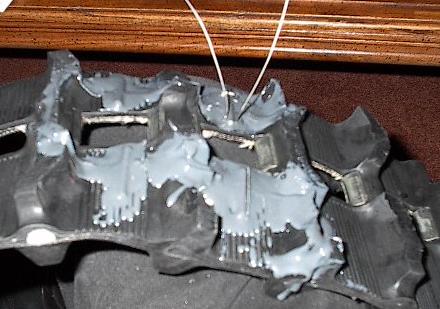
| I picked up my track from school, and was less than thrilled with the results. The "flexible" epoxy isn't particularly flexible. I guess it's a lot better than regular epoxy, but it still cracked when I flexed the track. It looks like it should be fine for keeping the seam together, but this joint is going to need some help. For that, I'm thinking about sewing it. Now, don't get me wrong here -- this isn't your mother's sewing kit. Pliers, hammers, the biggest carpet needle I could fine, and some 302/304 solid stainless steel wire. You can see my first test stitch here, holding the upper right pin in place. |
 |
| It's hard work, but it looks like this process is doable. Here I'm making the second stitch. It should take three or four stitches to hold each surface pin, and another handful on the seams themselves. |
 |
| I've put in three stitches on the first pin, each one twisted shut like a twist-tie. I figured this would give me a tighter lace, but now I'm worried about fatiguing the metal. For the next pin, I'm using a cross-stitch, just like lacing up a boot. |
 |
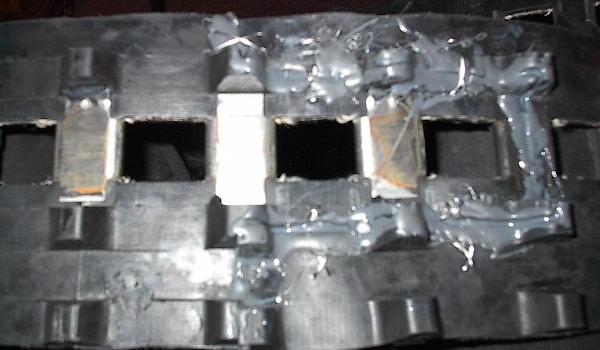
| Here's a shot of the inside of the track. I've laced in the pins, and started stitching up the seam. The big cross-stitch at the top wraps around one of the split reinforcing bars -- this should provide a lot of strength. |
 |
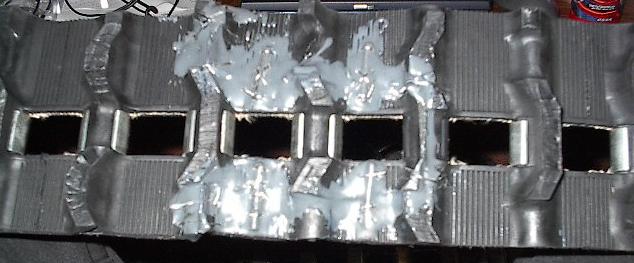
| One track all sewed up. That was a tremendous amount of work, despite how few pictures it yielded. It was just a lot of the same thing over and over. These 21 stitches took me five hours. |
 |
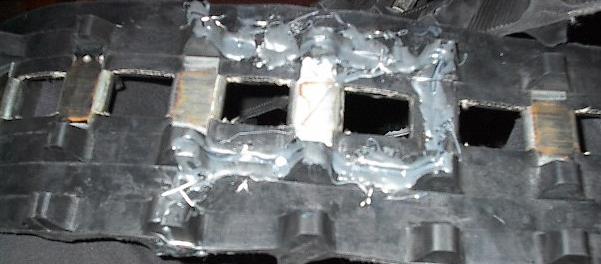
| Here's the inside of the laced track. You can see I've even put two stitches in under the missing track clip. These may or may not add any strength after the clip gets replaced, but they can't hurt. I have a feeling that I'm going to need every edge I can get. |
 |
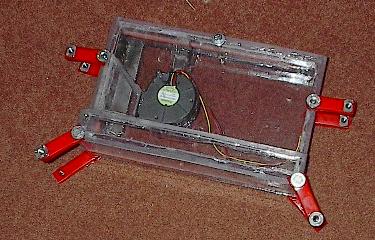
| Today I finally went the the hardware store and bought the 4.5 inch bolts I needed to mount the VIA enclosure. Here it is, with the eight short lengths of bungee cord that will support it. |
 |
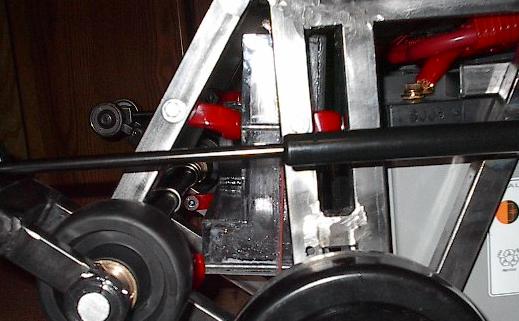
| I only actually got six of the eight shock mountings bolted to the frame, but it's sitting really nice. I couldn't get the far back bottom pair to line up with the holes I drilled for them, but judging from the state of the box now, I don't think I'll need them. |
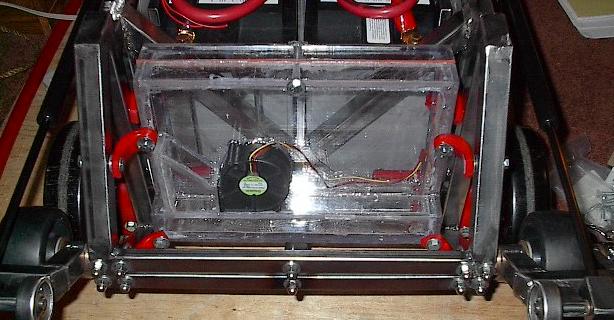 |
| Here it is from the side. This angle may look a little weird, but I spent a lot of time planning it to come out just like this. This spaces the box as far as possible from each and every static component of the robot, giving it as much shock travel as possible in this very confined space. |
 |