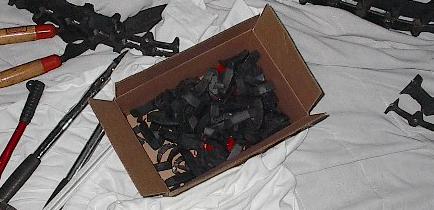
| This is a box full of paddles. I've finally finished cutting all of them down to a low enough height to be able to use them. I actually did this track work last night, but I'll lump these pictured in with today's report. There aren't really enough to warrant their own page. |
 |
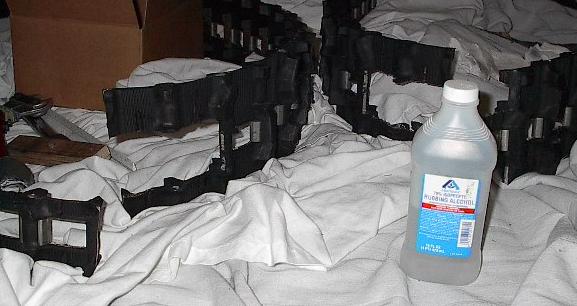
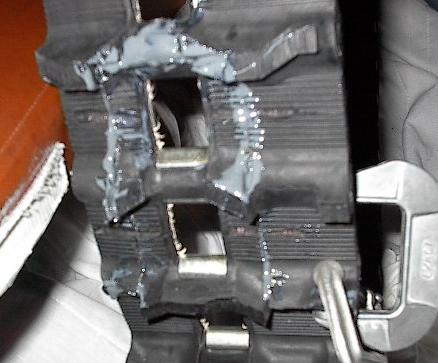
| Now that the paddles are all trimmed down, it's time to bond the edges together. In order to ensure a good joint, I've cleaned all the pins and track surfaces to be glued with isopropyl alcohol. |
 |
| Then I just lined up the seams, inserted the two internal pins, and glued the crap out of it. It sure isn't pretty, but hopefully it will create a good, strong seam. |
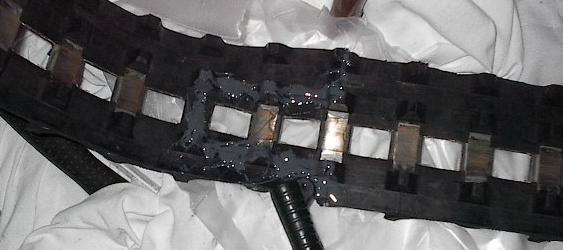 |
| Here's the other track's seam. I've used a few clamps to hold this one in place. It looks really sloppy, but that's just the stuff that slopped onto the surface -- the glue in the seam itself is what I'm concerned with. |
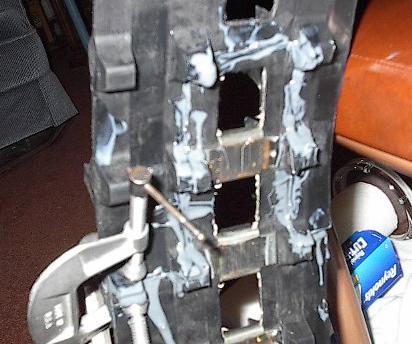 |
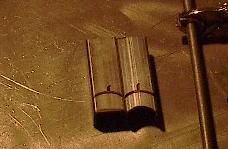
| Here's the tread side of the track pictured above. As you can see, I haven't put in the surface pins yet. I'll save these until the glue has set up. Then I'll be able to lay the track flat and get a really good bond between the steel pins and the rubber. |
 |
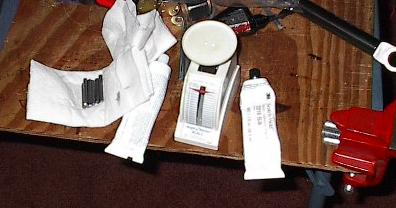
| Now, I wait for the glue to set up. I'm a little worried about this part. I mixed the epoxy by weight, using this scale. Needless to say, I'm not overly confident in its precision level. I did my best, and the glue seemed to mix in a pretty reasonable ratio, but I'll just have to wait and see how good the stuff cures. |
 |
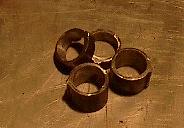
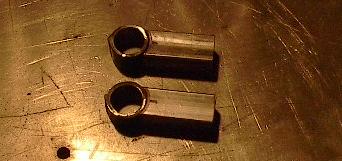
| Here is where I actually started working today. These are the four slices of pipe that have seen work in several build days so far. It had to be split, welded, cut, and drilled, and it still doesn't fit the bushings quite right. Now I've got to file out the inside to get a one inch diameter. |
 |
| In addition to those little bits, I also have to shape the little lengths of steel that will join the parts of the tensioner arm that I've already welded to the bushing holders. I'll grind a fish mouth into each tube so that it mates with the curved surface of the tubing. |
 |
| They should fit together something like this. |
 |
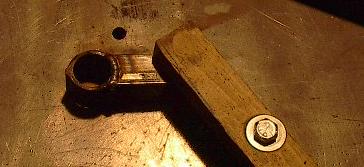
| Here's a pair of bits welded together. It's nice to get back to some good, normal steel working. I've been doing too much plastic, rubber, and glue work lately. This tensioner arm is really a trip back to basics. |
 |
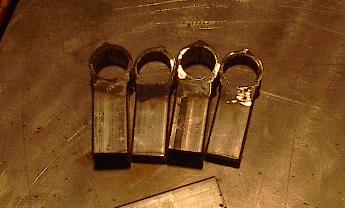
| A little more work and all four of these parts were welded and ground to shape. The bushings on these fit really tight, so I've gotten all the welding around the round tubing done at this point. Now, I'm going to drive the bushings into their positions, where they'll stay while I weld the rest of the tensioner. |
 |
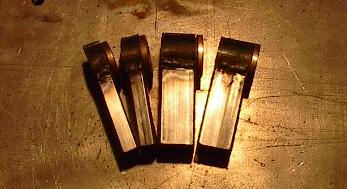
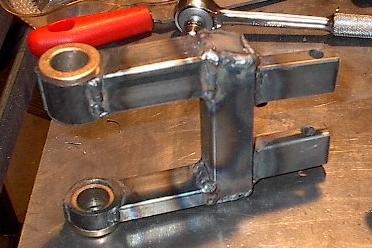
| Here they are with the bushings in place. Also note that the parts aren't the same thickness. This has been the plan all along, but I haven't really talked about it yet. I've opted to use a half inch tube on the outside of the tensioner arm to save robot width. This was one of many things I did to shave that dimension down as much as possible. |
 |
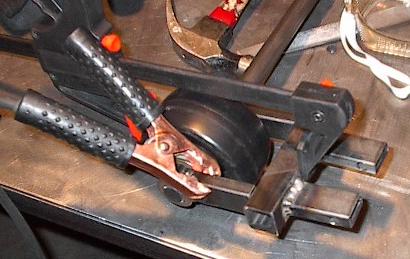
| Here's how they'll fit on the axle. I'll weld the rest of the tensioner arm while it's set up like this -- that should ensure that the bushings stay aligned and also that the spacing is just right for a wheel. |
 |
| Then I just clamped the rest of the arm into place, attached the ground clamp, and welded everything together. |
 |
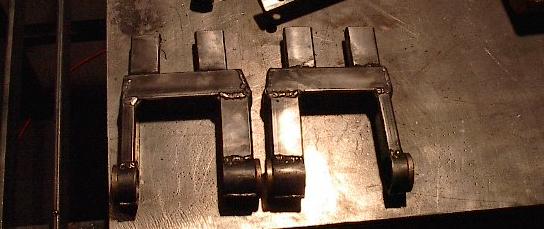
| And here's the first arm, with the general structure all welded up. It sure doesn't look like much, but it'll get the job done. Back at the beginning of the term, I would have gone to a lot of trouble to make sure it was prettier than this, but I'm way behind schedule. This thing will get the job done just fine, and I've got a lot of work to do. Time to move on. |
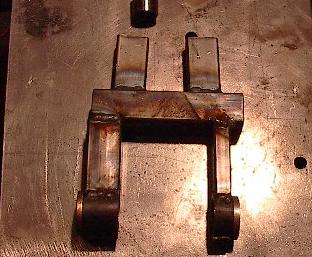 |
| I cut a pair of little steel squares and welded them over the ends of the square tube that runs parallel to the axle. This area was at risk of buckling -- the walls of the tube were going to have to bear all of the load without any lateral stabilization. The two little end caps will make a world of difference. |
 |
| Lather, rinse, repeat. Now I have two tensioner arms, all welded up and ready to go. |
 |
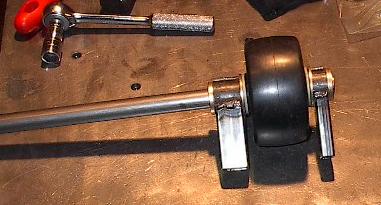
| One last thing before the tensioners will actually be useful -- this little axle. This was going to be a very simple thing -- just a steel rod 5/16 of an inch in diameter. That changed when I measured the wheels. They have a slightly smaller inside diameter than I anticipated. That means I have to grind the ends of the axle down just far enough to allow for this, which is a surprising pain. |
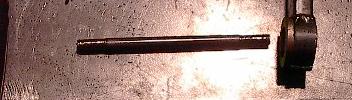 |
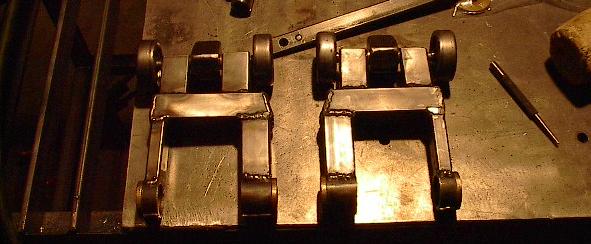
| I made two of these axles and threaded them up. They pass through a wheel on each side, the tensioner arm, and one of the mounting blocks for the compressed nitrogen springs in the middle. The two tensioner arms are done. I had hoped to mount the front axle, mount points for the nitrogen springs, and the battery mounts today, but it just isn't happening. It's really starting to become clear just how long some of these projects are going to take. While I'm done with most of the major milestones, I still have a great deal of work left in the form of little, atomic tasks that still need to get done. |
 |