|
Build Report #53 (06.14.2005)
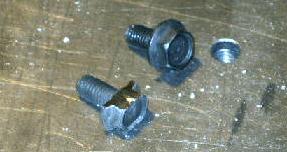
| Today, I'm going to make the static tensioner arms for the tracks. The reason I'm finally getting off my butt and building is because the repaired MC1-HV's are here with their new uMOB2 interface board. I finally have working motors, so it's probably time to get the mechanical end of things in order. The static tensioner arm project is one that I'm hoping will greatly reduce the stresses on the track seams by eliminating the self-energizing behavior of the old system. In any case, this is a picture of two bolts. These bolts just happen to be M8-1.25X16 bolts, which, as any machinists or engineers reading this should know, fit through an 8mm hole, have one thread even 1.25mm, and are 16mm long. I bought them, as well as eight others like them, from McMaster and Carr, and they didn't have any such bolts made of mild steel. For me, this means that I have to somehow remove the black coating if I want to weld them. I do, by the way, want to weld them. If I just leave them loose, I'll have to start carrying around a metric wrench, and that just won't do. As you can see here, rather than brushing off the coating, I've simply opted to cut the sides off of the bolt heat. This gives me nice even surfaces to weld, and makes sure all of the coating is removed in the area of the welds. |
 |
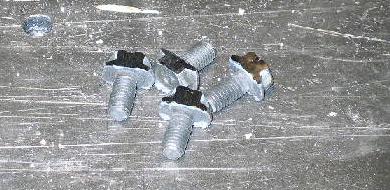
| This is a shot of all four bolts that I'm going to use with flats ground into their heads. The color came out looking a little weird, but let me assure you -- the bolts are black, and the flats are bare steel. They're all ready to be welded into place. |
 |
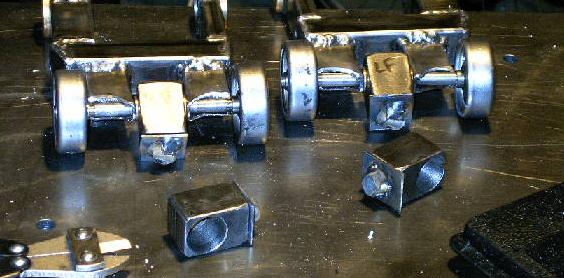
| Here I've set up all four mounting points for the tensioner arm. This was a fairly simple process -- I bolted 1-inch squares of steel to each mounting point using one of the modified bolts, and aligned each square about 20 degrees anti-clockwise from the mount point. This way, after I weld them, they should line up perfectly when tightened down securely. In the picture each bolt has been welded securely into place. |
 |
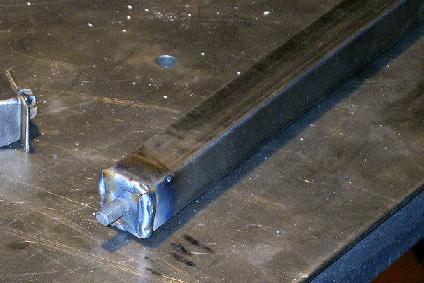
| Then, each of these parts (each consisting on a modified bolt, a small steel square, and some weldment) was welded onto an end of a square steel tube exactly 10.375-inches in length. I assembled the whole thing on the robot and tack welded everything into place to ensure proper alignment. I then removed the arm and finished welding the entire seam.
After this was done, I ground everything down to nice, smooth edges and I had two very nice static tension arms. They'll do exactly the same thing as the compressed nitrogen springs except without actually providing a variable length. |
 |
| Once all four ends were totally welded up, I had to grind all the edges down nice and smooth. This isn't just cosmetic for once -- the surface that mates with the mounting block has to be just right or else the arm won't line up right. Here you can see the difference the grinding makes. In case you couldn't tell, the left is "before grinding," while the right shows the finished product. |
 |
| And here's the finished product all mounted up. It turned out really nice. I only had to take one back out to the garage to fine-tune the fit, but after just that little bit of work they all lined up just right. I just screw in each end until it's good and snug and the square tube aligns with the mounting blocks perfectly (no metric wrench required). These two new arms will hold the tensioner wheels in position without allowing them to rock forward placing extra tension in the track. |
 |
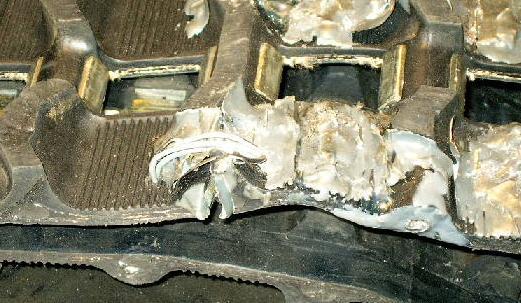
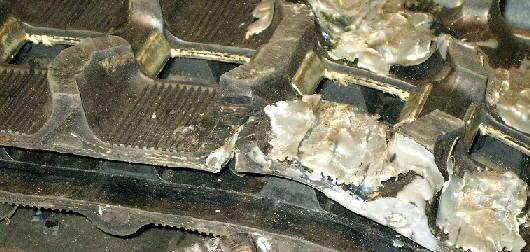
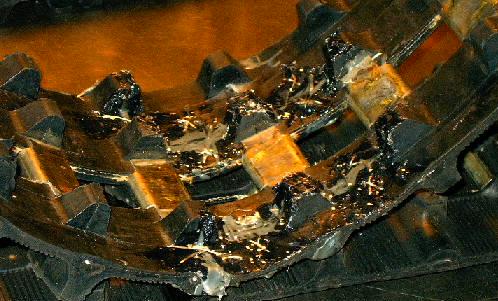
| With that little project wrapped up, I got to work on the tracks. We over-worked them a bit in the push to get things together for the final presentation back in April, and one of the seams started to pull apart. This is it, pictured here. At the time, I was under a serious deadline, so I contracted the track (while on the robot and still under tension) using a scissors jack from my car and did the best I could to patch it up. You can see the results here -- a big, ugly wrap of 14-gauge galvanized steel wire and a dangerously wide gap. With the tracks off, I'm hoping to get a much tighter, more streamlined, and stronger connection here. |
 |
| I cut all the wire out of the seam (including the fine stainless stitches I put in a long time ago) and trimmed the rubber back as close to the reinforcing bar as I could. This should give me a lot more room to work with and reduce the likelihood of having exposed metal on the outside of the track. |
 |
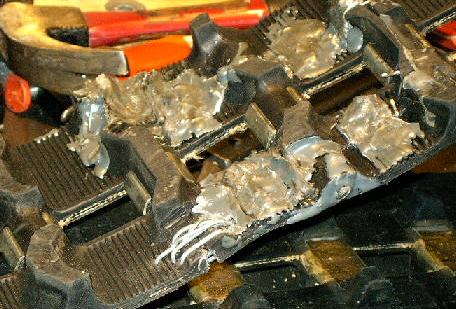
| Here's the new stitches, done with nice heavy wire. I was able to lay them all out nice, flat, and tight. They should hold much better than the old setup. I'll apply some ShoeGoo over the whole area to hold everything in place. ShoeGoo, by the way, is a great adhesive I bought from a Fred Meyer's check-out isle -- it cost me around $5 for a big tube of the stuff and it's way better than the really expensive flexible epoxy I initially tried to use. |
 |
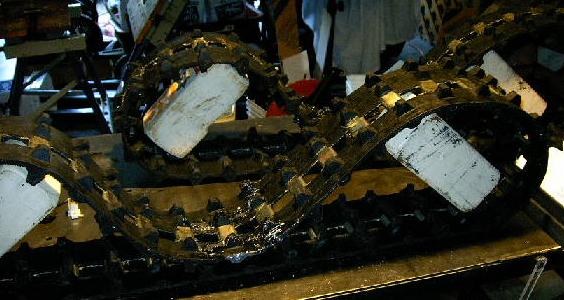
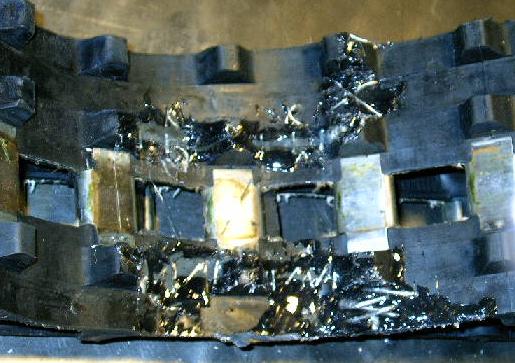
| I then fine-tuned the inside surfaces of the tracks. I've been really unhappy with how the interface nubs lined up along the seams, so I decided it was time to do something about it. I took a really sharp knife to them and removed all the rubber that was getting in the way. Then I positioned the tracks for gluing as shown here. The blocks hold the seams concave-up, which should provide the best continuity for applying the ShoeGoo. |
 |
| Then, I applied the glue. Nothing too complicated here -- I just cleaned everything up with a lot of denatured alcohol and slathered glue onto the seams and let it soak into the gaps and stitches. I also used it to fill in the nubs that didn't line up right along the seams. This should give me a much smoother transition across the seam and less stresses to boot. |
 |
| I asked for a quote from Carrol Tech Snowmobile Repairs on getting a pair of tracks made to my specifications so that I could have a nice, perfect, professionally vulcanized set of tracks for the robot. They were great about answering all my questions and they do absolutely beautiful work, but at $800 plus shipping for the job, it was just out of my price range. Anyway, I'm going to have to keep these poor things to last as long as I possibly can, so here's hoping that this ShoeGoo and steel wire solution is effective. |
 |
| End, Build Report #53 (06.14.2005) |
| Progress: |
Constructed static tensioner arms, repaired tracks. |
| Time: |
4 hours |
| Next Steps: |
Glue the other side, make uMOB2 mounting plate, shock mount VIA box |
|