|
Build Log, Day 31 (03.04.2005)
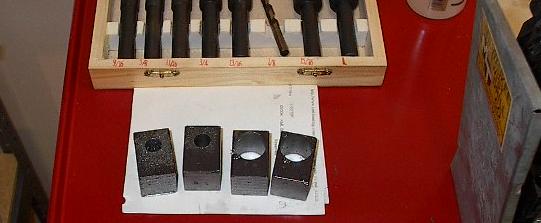
| This past Wednesday, I put some work into these little steel blocks. I forgot the digital camera, so you didn't get a post that day, but here's the result. These four blocks are each 1x1x1.5 inches. Two of them have 7/16 inch holes in them, while the other two have 7/8 holes in them. The big holes really made the drill press unhappy, but it got through them. They still need some more work, but these will eventually be the mounts for the compressed nitrogen springs. |
 |
| Here I've drilled another hole into one of the blocks. That hole is 7.6 mm. The threads on the springs are metric (which, for the record, is an inferior standard), so I had to buy a special drill bit and tap just for these holes. |
 |
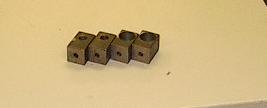
| Three more holes and the blocks are all drilled. I still need to tap the metric hole, take off all the sharp edges, grind two of them to 7/8 wide, and do a little shaping. |
 |
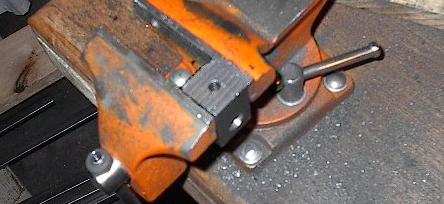
| That was it for the work at the school shop. Now the blocks come home, get clamped into my little vice, and out comes the tap wrench. |
 |
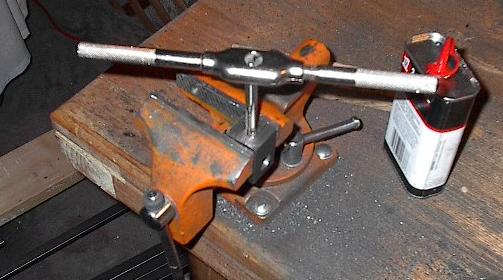
| My first metric tap job. The springs I got have M8 threads, which means that the hole is 8 mm wide. Unfortunately, it didn't say anything about thread count. I had to get the springs and measure, and found that each thread is 1.25 mm. So, I went out and bought a M8-1.25 metric tap, pictured here. This tap, like the drill bit I used for the holes, may never get used after today. |
 |
| This is where the rubber hits the road (not literally -- God willing we'll get to that next week). We get to see if my M8-1.25 tap made threads that are compatible with the springs. Everything looked great on paper, but that doesn't always mean much. Anyway, today appears to be my lucky day (it's about time). Everything lines up and fits nice and tight. |
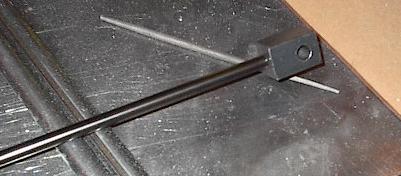 |
| I tapped out another block and mounted it up. This is how the springs will be held into place. I still have to clean up the blocks, but this is the idea. |
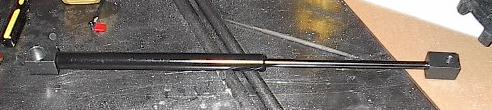 |
| Two more tapped holes and all the blocks are mounted up. Unfortunately, these didn't go quite as well as the previous two. |
 |
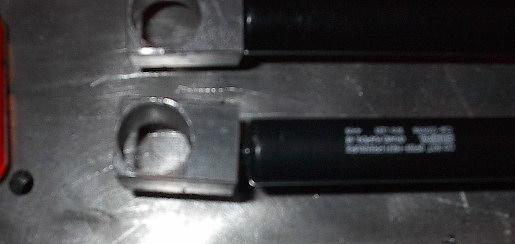
| Here's a close shot of one of the blocks, and it's way off. The tap got started just a little crooked, and once it started feeding along its own threads it just got worse. This is a tough problem to fix -- there are already threads cut into the hole, and I want to cut new ones at a slightly different angle. The main problem with this has to do with the nature of taps. They cut metal, so they have to be incredibly hard. In order to achieve this hardness, they're extensively heat-treated. This treatment increases hardness at the cost of ductility (the ability to absorb energy). In other words, they're brittle. If I put much bending moment on them or drop them or something, they could break. This makes it somewhat sketchy to force it through a crooked hole. |
 |
| Well, all that aside, I went for it. I bought this tap for the sole purpose of tapping these four holes, so I'm not too worried about breaking it. It went really well -- I had to muscle it through the old threads, but it held up to it. |
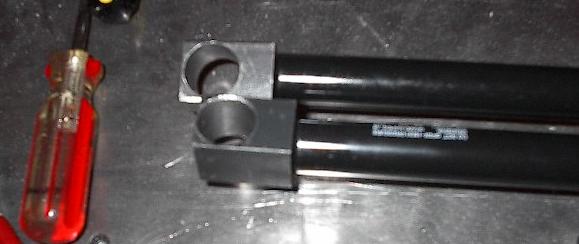 |
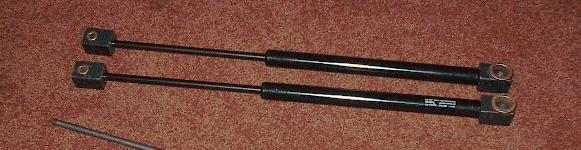
| Finally, I popped in the bushings that will provide a bearing surface and lubrication for the mounts. I still have to round off some corners and do a little additional grinding, but this is how they'll fit into the tensioner system. Unfortunately, I found that the hole diameter varies slightly over the depth of the hole -- in other words, the holes are slightly too small on the other side. That kind of sucks, but it's not that big of a deal. I can just widen them out a bit with a rat-tail file later. |
 |
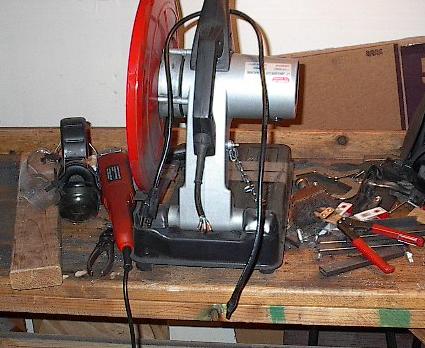
| With those mounted up, I figured I'd turn my attention to a few other little matters -- I've got a few minutes, and there are some things that need doing. For example, this is my chop saw. It doesn't work. Can you diagnose the problem? That's right! The cord doesn't go from the plug to the saw. |
 |
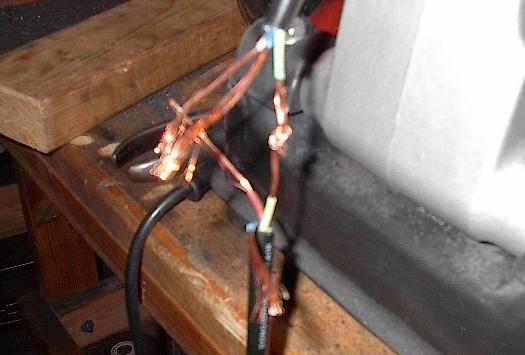
| Last time I fixed this problem, I twisted and soldered the wires. This time I'm thinking about something a little more robust -- that's right, that's a square knot. That should provide a good electrical and mechanical connection. |
 |
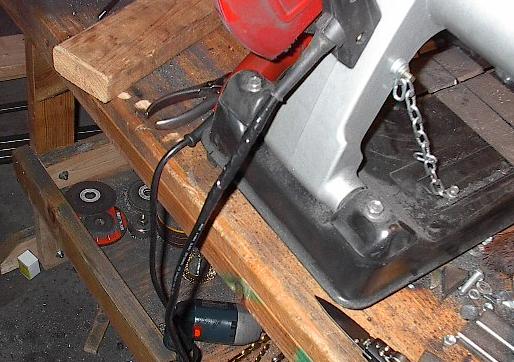
| Two more knots, a lot of electrical tape, and it's as good as new... Well, that's unlikely, but it does spin when I pull the trigger, and that's all I'm asking. |
 |
| End, Build day #30 (03.04.2005) |
| Progress: |
Mostly manufactured nitrogen spring mounts. Fixed chop saw wiring. |
| Time: |
2 hours |
| Total Time: |
181 hours |
| Next Steps: |
Grind corners and faces of mounts, build tensioner arm and sub-axle. Build drive axles. Track. |
| Status: |
Behind schedule, seven days |
|