|
Build Log, Day 3 (01.19.2005)
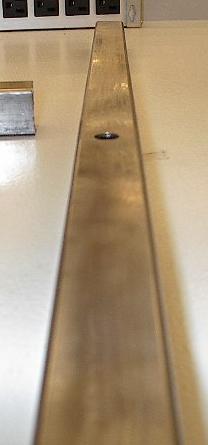
| Today I had a very simple task -- drill some holes. Some of the members need to have some holes drilled in them before the side structures are welded together. I was just going to do it by hand, but I was going to the mechanical engineering lab at school today anyway, so I figured I'd use the drill press. What was supposed to be a simple task turned into a pain in the ass. The cross-slide vice had so much slop in it that it proved far more useful as a door stop than anything else. Even without it, the drill press definitely left something to be desired in terms of precision. Look at that hole! This won't do at all, it's off by over a sixteenth of an inch. |
 |
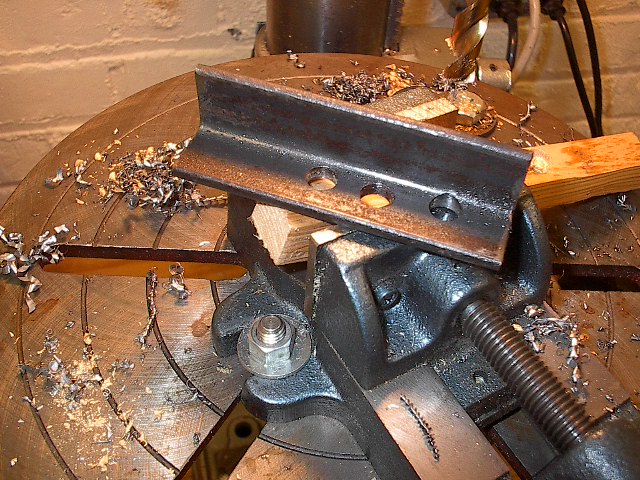
| Well, it's time to get creative. I can't tolerate this kind of result, so I have to do something to keep everything lined up right while I'm drilling. Because my paper templates worked so well for cutting, I figured I'd go the template route again, only this time, I'd use steel. This is an old chunk of angle scrap that was rusting away in a cabinet, so it became my guinea pig. You can see the wide variance in position of the three holes. By tweaking the setup, I got one that was within two hundredths of centered (the one on the left). Now I can simply clamp this piece onto my tubing and drill through the centered hole. Not exactly good, tight-tolerance machinist's practice, but good enough for me. |
 |
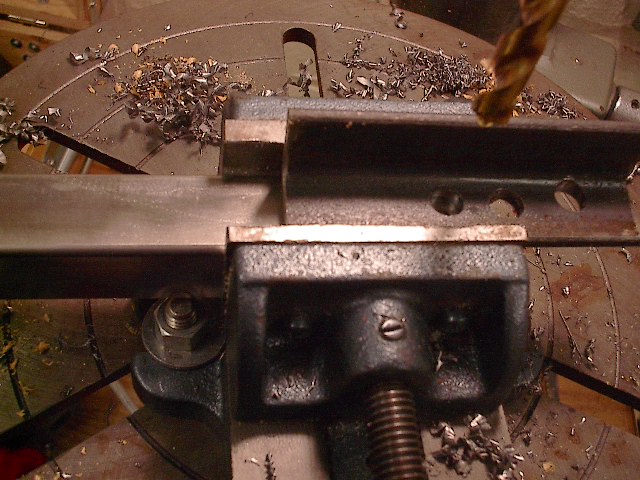
| Here it is lined up for drilling. I just had to adjust the work piece in one free dimension, and the template did the rest of the work. As long as everything was close, the steel template guided the bit to contact right in the middle. Lets see how it worked. |
 |
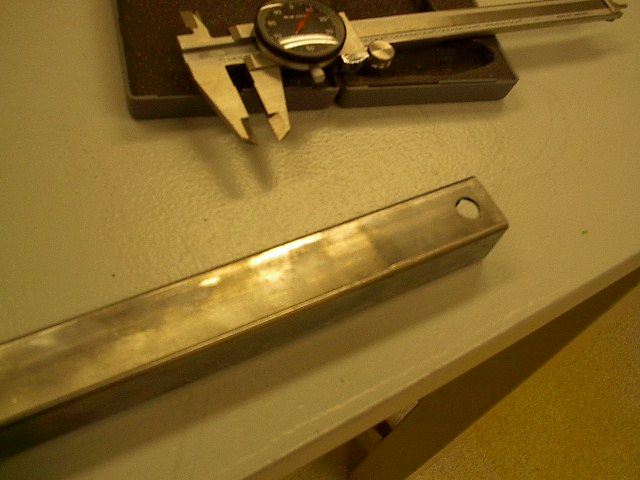
| Here's the result: a much better hole. Looking at it, we can tell it is much closer to centered. The caliper shows some deviance (on the order of one or two hundredths), but that should be just fine. As long as I can cram a bolt through it and it doesn't induce unnecessary stresses, I'm happy. |
 |
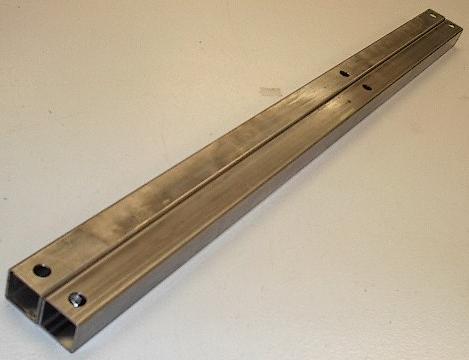
| The two top rail pieces drilled using this method. Looking good. |
 |
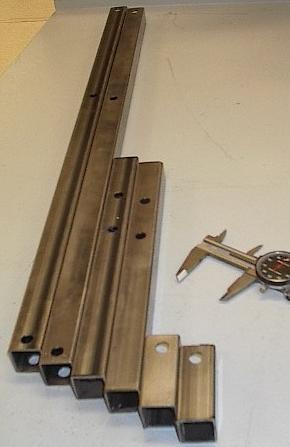
| All six pieces, drilled and ready. You can see the two short ones on the right that I drilled before making the template. These have visible deviation and poorly-centered holes. The other pieces, however, look much better. |
 |
| End, Build day #3 (01.19.2005) |
| Progress: |
Drilled some holes. It took much longer than it should have. Reasonably happy with the result. |
| Time: |
2 hours |
| Total Time: |
28 hours |
| Next Steps: |
Weld weld nuts to the drilled holes. Grind all pieces to final shape. Double check all fits and tolerances. Evaluate PAD/PAM process. Clean dirty pieces. Weld, grind, and clean. Assemble into chassis framework. |
| Status: |
On schedule |
|